1962 Bel Air Bubble Top 409 Project

CASHguzzler409

Well Known Member
Supporting Member 6
Your sure right about improving on what the factory did. Thats a hard thing not to do, over restore, my partner keeps me in check, by telling me thats
the way it came from the factory, so leave it alone. lol.
 

CASHguzzler409

Well Known Member
Supporting Member 6
Hi Wrench... your reply is something everyone has to do when restoring a long term project, PLAN. This would be a good subject for a post, "Where to Start"
or something like that. Its best if you have the space at home to work on your project, It'll never get done if its stored somewhere else. IMO. We usually
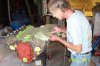
start with stripping the car to just the frame and body and engine, fenders, doors, hood, trunk, interior, completely off. You must first remember to take pictures of your car as it sits BEFORE and DURING the process, even little things , its best to have a picture of it, so you can remember how it goes back together. I find it
easier to have plenty of boxes, plastic bags, and a lot of 4x5" cards to right on and put in the bags. They're hard and will hold up better than paper, and
there cheap. We usually separate the body from the frame, using building blocks, 16 of them. There's a thread on here about different ways to remove the body,
this works for us, as were cheap, and it can be done by 1 person, with a jack and 2 - 8x4. Ok.... lets let some of the other guys give there opinions on starting a restoration project. Good luck, stay positive and little by little it'll get done. OH.... I forgot.... have lot's of CASH.....
:beer:yikes:fear
 

wrench

Well Known Member
Supporting Member 15
I understand the pictures, bags, boxes etc process. (My wife is a hoarder from WAYYYYY back LOL. I guess what I mean are the items one should do before proceeding to the next step so you don't have to remove something you've already installed. (The roof / window / molding / seals, etc.) I wouldn't know where to begin. Or 'be sure to put the 'X' on before you you install 'Y' or you'll be sorry. Those kinda things.
 

oldskydog

Well Known Member
Supporting Member 10
If you don't have one, get the Factory Assembly Manual. It is organized in the order that the factory assembly line used to build the cars after the body was received from Fisher Body. The body build up is up to you as I don't know of any Fisher Body manuals before 66.
There should be plenty of experience here on the forum to help with the finer details.
 

CASHguzzler409

Well Known Member
Supporting Member 6
I need help ? We're at the point where the body work has been completed, so we decided to install the doors to see how they fit. The drivers side was not good, but the passenger side fit, was perfect. While doing this we decided to fit the rear seat frames in, as we had to do some welding on the panel coming up from the
trunk, to the back seat structure. When we bought the car it had a 1 piece new floor installed, from the cowl to the upper part of the rear trunk, just behind the seat. The back seat frame fit great. We then put the bottom of the rear seat frame in, we noticed that there was no bracket or hold down part on the rear floor, to push the frame into, to hold it in place. Also the front part of the frame does NOT go all the way to the floor, as it sits on the hump. I did take some pictures, so i'm sure many of you know what I need. thanks stan
100_1581.JPG 100_1583.JPG 100_1581.JPG 100_1584.JPG
 

Attachments

  • 100_1582.JPG
    100_1582.JPG
    107.7 KB · Views: 140

blkblk63ss

Well Seasoned Member
Supporting Member 5
Yes, look's like bracket's are needed to snap lower seat frame in, whether the seat is supposed to meet floor ?????? Some one with a bubble will have to chime in!!!!! Could that possibly be the wrong rear seat ?????
 

Last 60

Well Known Member
Supporting Member 1
I believe when my son Scott put the floor in his '62 we had to cut the seat brackets from the old floor and re-use them. I think we also did the same thing for the brackets to screw the interior quarter panels to.

Lonnie
 

CASHguzzler409

Well Known Member
Supporting Member 6
There's more to it, than just removing old floors, you have to get all the extra's that are on it also. This is a small step, but thanks for the feed back.
Was at a car show last night and there was a 1960 impala, original 348- 3x2- 4 speed car there, looked cool, and got me excited again, yes it was
red....
:brow
 

CASHguzzler409

Well Known Member
Supporting Member 6
Thanks guys for all the reply's, I finally found a picture showing the rear seat, and it is raised off the floor about 4 ".
Does anyone with a 62 Bubble Top know if the back seat has the filler panels, above the arm rests, like the impala's?. I had to pull the body out of
the working garage and put it in our enclosed trailer, as my partner is painting a 70's pickup at the same time as he's doing our 62. Way to much
energy for me. LOL...
:sleep3:sleep3
 

Blk61409

Well Known Member
Supporting Member 9
Yes, the Bel Air Bubbletop has the filler panel. Here is a photo of one I have.
 

Attachments

  • image.jpg
    image.jpg
    52.7 KB · Views: 71

CASHguzzler409

Well Known Member
Supporting Member 6
Thanks for the photo, its been a year since we first got the car, and it was all thrown in the car, so can't remember if we have them or not.
Just another part of the puzzle.
 

CASHguzzler409

Well Known Member
Supporting Member 6
Picked up our 62- 409 motor at the machine shop on Fri, didn't get to excited untill we put the heads on it. WOW .... New Avatar shows us masking it off, readding it to paint.
We put the QB block back together with 30 over Ross pistons, 63- 425 hp cam, and the 690 heads rebuilt,
dual 919 dist and we're going with the WCFB - 2x4's for the original look.
Our frame is done and just waiting for the motor, it won't be long now. :wax
:burnoutGuess we'll have to start looking for some good tires to burn.....up.
 

Attachments

  • 100_1603.JPG
    100_1603.JPG
    78.8 KB · Views: 157
  • 100_1604.JPG
    100_1604.JPG
    77 KB · Views: 157
  • 100_1606.JPG
    100_1606.JPG
    79.7 KB · Views: 158
  • 100_1609.JPG
    100_1609.JPG
    86.4 KB · Views: 158
  • 100_1610.JPG
    100_1610.JPG
    76.2 KB · Views: 151
  • 100_1611.JPG
    100_1611.JPG
    54.5 KB · Views: 146
  • 100_1589.JPG
    100_1589.JPG
    78.6 KB · Views: 153
  • 100_1594.JPG
    100_1594.JPG
    87.8 KB · Views: 149
  • 100_1599.JPG
    100_1599.JPG
    60.3 KB · Views: 148
  • 100_1609.JPG
    100_1609.JPG
    86.4 KB · Views: 136
Last edited:

CASHguzzler409

Well Known Member
Supporting Member 6
Thanks boxerdog, I guess? I don't what a PITA is, but think its like the pits..... lol
:dunno 
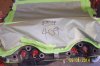
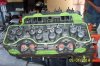
going Orange today....
 

blkblk63ss

Well Seasoned Member
Supporting Member 5
You've never heard Pain in the a$$??????:D:D Don't let that little doeggy breath them fume's!!!:think:think
 

CASHguzzler409

Well Known Member
Supporting Member 6
Yes I have, and I have said it many times. That dog is something else, she comes down and sits right next to her owner, my partner, no matter what he's
doing. But she is smart enough when the paint gun comes out, she heads up stairs to the coach. hahhaha Are you going to the Convention? If so hope
to meet up. stan
:brow
 

blkblk63ss

Well Seasoned Member
Supporting Member 5
Yeah, i plan on going if Phil let's me in free, and that won't happen!!!!!! :D :D:D {SORE SUBJECT} :angry:angry:angryI guess i ought to get my rear in gear and respond.
 
Top