1959 Driveshaft

blkblk63ss

Well Seasoned Member
Supporting Member 5
You can leave wheel on to for the one you want to hold while the other axle by itself is spinning..
 

1959chevybr

Well Known Member
Throughout me trying to explain the axle/wheel/drum vibration I have not said much about the drive shaft. The rear shaft at 60, I can lay the back of my gloved hand against the shaft and it is VERY smooth.. The front shaft has about 1/32 vibration (I have not had it balanced yet). Before the last shaft angle change both shafts vibrated quite bad.
 

1959chevybr

Well Known Member
The below is a picture of a new drum on eBay. As you see there are balance weights (as there are on most pictures I have seen). There is no weight on either of my drums. Interesting, it does not mean much, just a fact.
 

Attachments

  • s-l1600.jpg
    s-l1600.jpg
    49.4 KB · Views: 2

blkblk63ss

Well Seasoned Member
Supporting Member 5
The below is a picture of a new drum on eBay. As you see there are balance weights (as there are on most pictures I have seen). There is no weight on either of my drums. Interesting, it does not mean much, just a fact.
It might ,unless old drums are perfectly in balance without any weights .
 

blkblk63ss

Well Seasoned Member
Supporting Member 5
Evidently 2 piece back in. Do you have it phased as factory?. You can check the front and rear driveshaft with a dial I indicator with a wheel on end of stem. Also when you changed joints did you be carefull not to distort yoke ears by hitting to hard on yoke . You can even distort with a press too ,if not carefull.Working in a shop I have seen where when changing joints the drive shaft's have been distorted by hitting too hard and have a vibration after changing joints. You say you feel a 1/32 vibration on front. ???? Even though you balance drive line it still has to be straight. Like I said phase as factory is more important also.I guess I need to explain the dial indicator more. Get one with magnetic base and put on body pan next to drive shaft and the roller wheel to drive shaft and turn shaft by hand to take a reading of how much shaft wobbles if any. This test would tell you for sure if you have a problem in that area. We usually let drive shaft rotate at idle and just hold a stationary object next to it to see for quick eyeball check to see if drive shaft had any wobble,if so them we would measure
 
Last edited:

ozzie7

Well Known Member
This has been an interesting thread to follow since it may be helpful when putting a 700R4 in my 60 Bel Air.
Thanks to everyone for the tons of info and 1959chevybr for documenting the process.
I came across this LINK and thought it may or may not apply to this situation or you probably already know.
 

1959chevybr

Well Known Member
Another challenging day but progress was made.. First off, on ozzie7,, good place to look for help with angles is Spicer Calculator,, just type that in and it will pop up, it just mostly helps with the math but you also can sit there and plug in a lot of "what ifs" without doing the work. Like, what if I raise the CB. What if I lower the pinion, it is not perfect but it helped me. There is an information link there also, click on the little "i". Remember one thing with the Spicer Calculator or any of the tools on their site, the pinion when pointing down in the front to them, it is pointing up as far as the calculator, they consider the engine, front and rear shaft and the pinion shaft as one piece and starting at the engine it either slopes up or down from front to back. Pinion was opposite of what I had always used. Then if you can make your angles work as stated in the service manual which the guys shared with me, that is what I recommend. If you cant get what you need I will give you my alternative, at this point seems to work pretty well, I could not get my angles to the manual specs.
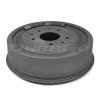
Todays work. We left off with me being pretty sure the one drum was bad on my car (out of balance), I ordered drums (NAPA), they came in this morning, I picked them up and installed. When my help arrived we ran the car up to 60 on the lift, just brake drums and the vibration persisted. We jumped back to the previous brake drum suggestion and ran one wheel at a time with no drum. This gets confusing but we took one drum off and there was no vibration, switched the situation (other drum on opposite side) and there was vibration. Changed the new drums from wheel to wheel and to make it easy understanding the vibration followed one of the new drums. When running either side with no drum and using the "best new drum" on the other side there was no vibration. So I had one good old drum and apparently one good new drum and we installed those and things were very quiet. Put the other new drum on and had vibration right away. So we put on one old drum and one new drum. Wheels/tires back on and a test run on the lift. Drive shaft not bad, front a little off. Checked all joints, connections for anything abnormal, all seemed ok. Wheels/tires doing fair also. I would like to say, the Cooper tires I have, I do not recommend. When spinning they look like they are way out of round but we put a gauge on them today and the run out was about 1/8 inch, looks much worse. I had taken them previously to a tire cutter here and he said they did not need truing up, I think they do but not so bad I guess. The US Mag wheels are also not perfect but not too bad either. All these things are going to contribute to being little a less than perfect. So we took the car down and headed for a test drive and it was a bust, traffic was so bad on a nice 80 degree day, everyone was on the interstate heading to or from the beach. We tried to get a test of over 55 when the traffic was more like 45 so that is delayed until Monday. We would have likely had to go at least 20 miles out of town to get some free highway. I never realized rums could so easily cause a severe vibration. So I am more convinced than ever that we have been working two vibrations and not really realizing it. One masking the good or bad we did for the other. Monday it is off on a test drive and if it is better than a "fair" test I will pull the drive shaft and have it rebalanced again, reason being I went back to an "out of phase" front shaft as suggested by most of the guys on this site. . The shutter which was once VERY pronounced right now is less than a whimper. Again assuming things go in a positive direction Monday I have a plan for the center bearing after the rebalance. A guy at the Myrtle Beach Run to the Sun show shared this with me and take it for what it is worth, he modified his center bearing mount and got rid of the shutter totally. He raised his CB 1/4 inch to get his angles, as I did, so this makes it more easy for me but he made a 4"X4" or so 1/4 plate that was tacked to the bottom of the bearing, welded 2 nuts on the top of the plate, drilled 2 holes in the frame (as wide as possible) perpendicular to the regular mounting holes and would eventually add two more mounting bolts. Next he cut two 3/16 X 1 inch strips of metal about 3 inches long and welded them to the new 1/4inch floor plate and tacked to the side of the bearing (as high as possible on the bearing). So now it is somewhat like the shape of an A roof. The bottom plate has to be shimmed on the sides as the spot where the bearing sits is slightly raised inside the frame. Of course he popped the rubber out before welding. I am not the inventor of this nor do I know if it really works. The plus that I see is,,, what can it hurt? If you know of something let me know because I think I am going to give it a try.

If you are wondering how he lined everything up for drilling etc,, he drilled the two regular mounting holes from the spacing of the bearing holes. He put his bearing in place and then took the two regular mounting bolts,,, put them thru the 1/4 plate and screwed the bolts into the bearing but the 4X 4 plate is now bolted under the bottom of the frame. He then drilled the two extra holes thru the 1/4 plate and the frame at the same drilling. Removed the bearing and then lined the regular bolts thru the plate and into the bearing and tacked the bottom plate onto the bearing. I am sure this will fly in the face of many and for sure it not for everyone but if you have consistent shutter on take off it might be an interesting Saturday project. If you dont like it a new CB at Auto Zone is $8.. yes $8. I have bought 2 to cut up and change heights. At NAPA $55. It might help,, might not. It was claimed to be a success by one man.
 

ragtp66

Well Known Member
The TSB that was posted said to refer to the 61 shop manual for the dimension checking. Attached also is the chart for the rear springs. Eatondetroitspring.com can make you a set of springs off the original GM blue prints instead of the. One size fits nothing that you get from the parts stores. One other thought popped into mind probably has nothing to do with the primary vibration your trying to solve but goes back to the collective concept that you spoke about before. Sooooo if your still running the ball bearing front wheel bearings have you inspected and repacked them and followed the factory steps of torquing first? If you converted to discs this point is irrelevant but I couldn’t remember if you had drums or discsD1C3FDAC-2794-42BE-B763-FF3DC35ED145.jpegA1B50E73-F0D0-4FC8-8596-8D5850E5AAB4.jpegA1B50E73-F0D0-4FC8-8596-8D5850E5AAB4.jpeg
 

blkblk63ss

Well Seasoned Member
Supporting Member 5
You can buy a cb that is not surrounded by rubber. It would probably help on take off shudder because it won't let drive shaft shift. I am surprised having to use one old drum and one new,makes no sense.
.
 

1959chevybr

Well Known Member
The new drum was obviously out of balance. We are going to put the 2 drums, the old one and new one on a old style bubble balancer next week to see if it shows anything. I had the solid CB and slip rear shaft, I know a lot of guys love it but did not work to well for me, course that was before we found all these other issues and got decent angles.
 

1959chevybr

Well Known Member
Another couple words about the new drums, both same part number but made differently, most likely different manufacturer. These were the only ones I could get over night but usually NAPA is the better choice of the local auto arts stores, looks like not in this case.
 

1959chevybr

Well Known Member
I am far from an expert on phasing or not phasing. The very little I know is if there are equal number of universal joints they should be in phase, always. If there are 3 then the 2 rear should be in phase but the front actually does not have a corresponding joint to be in phase with, in other words joints are in phase and with equal angles to cancel out the harmonics of the shaft speeding up and slowing down, the third joint has no partner joint to cancel with. All somewhat foreign to me. I can say this, I have a drive shaft that is in phase and I have a drive shaft that is out of phase as GM made it. Since I am not really versed in this technology I have to take the "show me" approach. After having both in the same car the "out of phase" works somewhat better in this particular instance. This attached video for me being relatively inexperienced is a real eye opener. Though it does not deal with 3 joints, it does a great job of describing 2. I enjoyed it, maybe you will also. You may have to copy and paste to your browser line.
 

1959chevybr

Well Known Member
blkblk63ss
Some interesting comments out of the 58 Chevrolet Service manual which I just received, previously I just had the 59 supplement. In the 58 they are adamant that the front shaft be 90 degrees out of phase, course 1958 was a long time ago and I am sure you guys with lots of X frame experience have found better ways to get around some of these old suggestions. Also the book had suggestions for shutter whether it be loaded or with just a driver. Not saying it is correct today and certainly not up to date but maybe some of it is still relevant.
 

Attachments

  • IMG_20180414_211939961.jpg
    IMG_20180414_211939961.jpg
    38.7 KB · Views: 10
  • IMG_20180414_211959365.jpg
    IMG_20180414_211959365.jpg
    28 KB · Views: 11
  • IMG_20180414_212412385.jpg
    IMG_20180414_212412385.jpg
    56.6 KB · Views: 10
Top