
You are using an out of date browser. It may not display this or other websites correctly.
You should upgrade or use an alternative browser.
You should upgrade or use an alternative browser.
62 Impala Project
- Thread starter Topstrap
- Start date
Dennis, look's like progress. my fellow wrencher when i still was working bought a scope like that to inspect cyllinder's on f%%d engine's while replacing broken spark plug's. on the sunken well motor's .I told him maybe he could start doing cheap colonoscopy's, he said he might need to get his licence first,  any way nice job on roto ,but get it secured or bolted together on bottom if you haven't yet !!!!!
any way nice job on roto ,but get it secured or bolted together on bottom if you haven't yet !!!!!Topstrap
Well Known Member
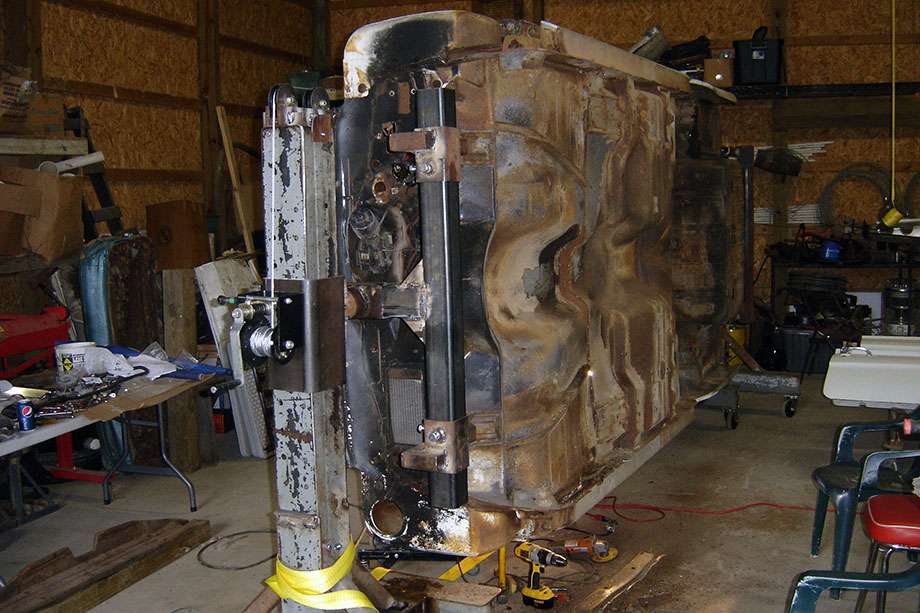
Finally worked up the nerve to start cutting old metal out. I agonized on this for a few weeks, read a lot of threads and watched 100's of videos on old Impala and other old cars restorations and how they planned their attack.
I still think the overall body on my car is pretty good but I'm finding that there are certain areas on these Impalas that are prone to rust and to do it right you have to peel back quite a few layers to make sure you get all the bad spots repaired. I've never attacked anything like this before on a car but do like to fab and build things around the shop.
After a visit to Lutty's and bringing home two new floor pan halves (easier and cheaper to get them both and then cut out the small sections I'll need), new front one piece floor brace, floor shifter hump and two new rear body mount boxes I had enough to get started. I was hesitant at first on cutting out the floor and wanted to keep it as small as possible but soon found that with some planning it was easier to cut out a large section to get to all the bad areas around the front cowl area and front part of the inner rocker panel.
After getting the floor cut out I found the inner rocker was going to need a lot of repair. At least to me and my first venture into this I had to lean back and form a plan. HELP, but of course Chip Foose didn't come running so I had to continue on my own. Chris has avoided this part so far, waiting to see how it progresses before coming out and helping on this part.
Ready for surgery, I think.
Got the front brace removed, both ends looked like this so lots of work ahead.

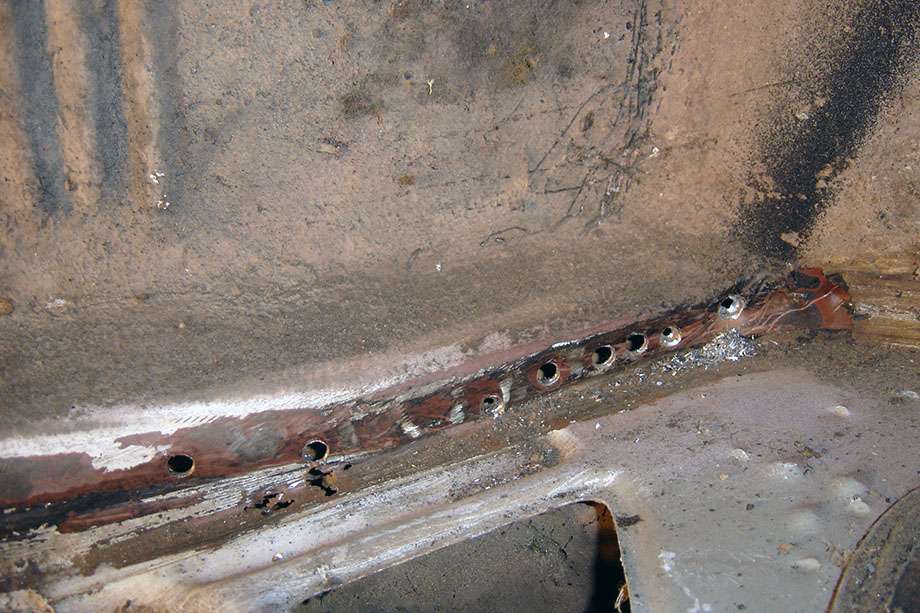
Before cutting out the floor I started drilling out spot welds and slowly started in.
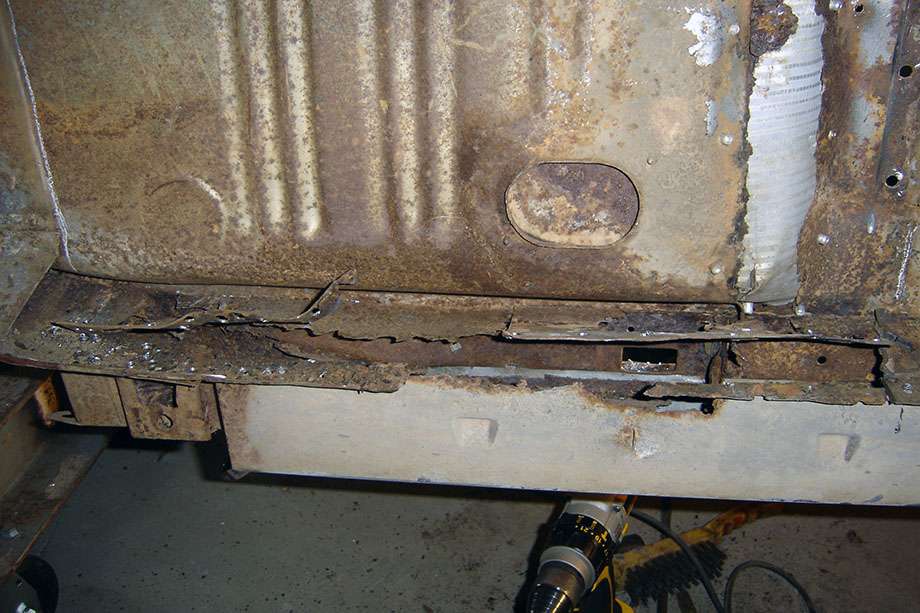
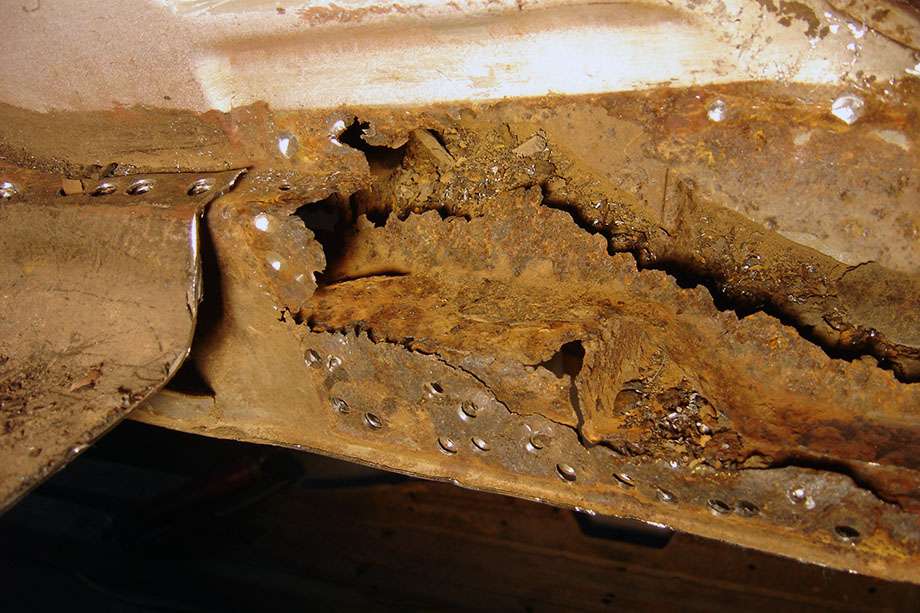
Kept looking worse the more I opened it up.
Time to open up the floor.
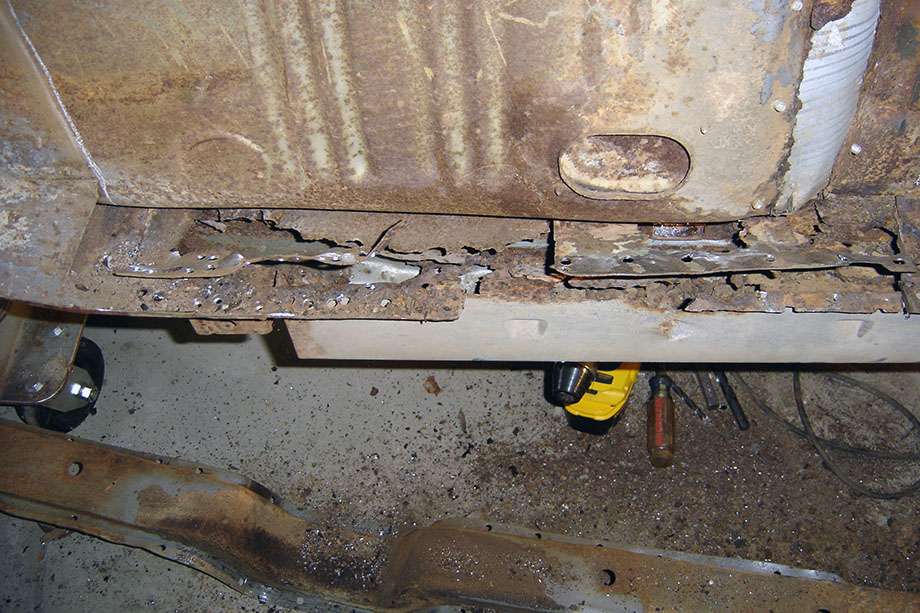
Digging still deeper, the brace inside this area was gone. Hope to find pictures to see what it was supposed to look like in there.


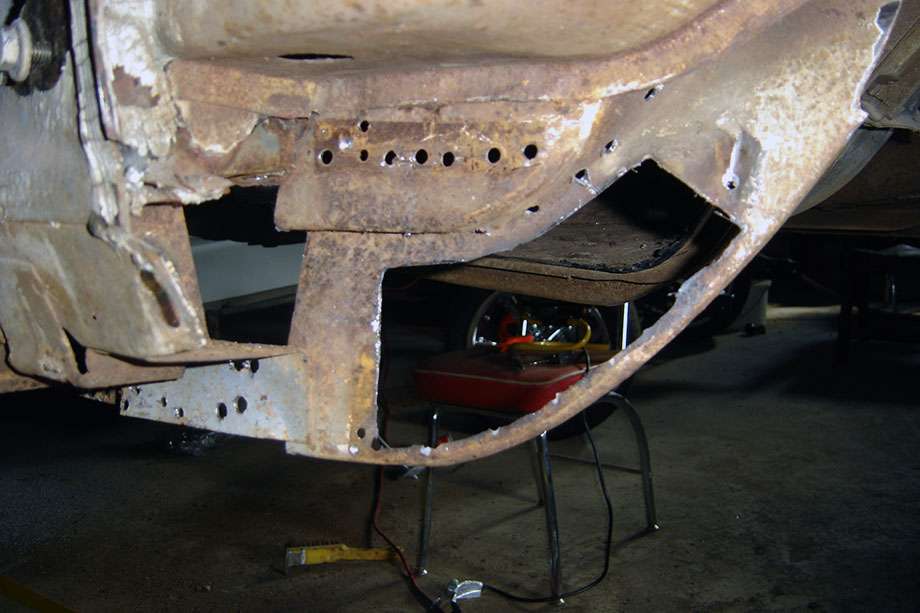
Front cowl area, think I can make these parts.
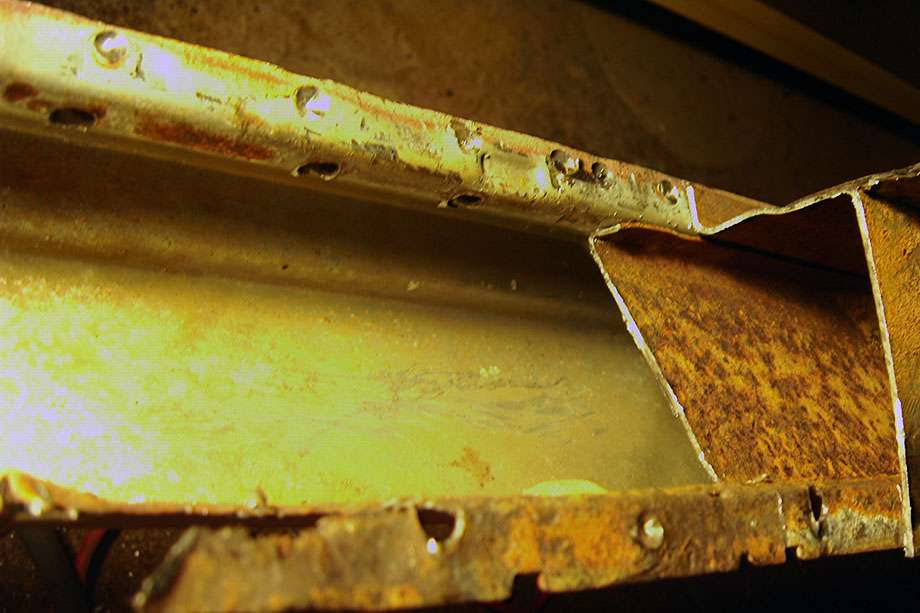
After getting all the rusted pieces out and cleaning it up the inside of the outer rocker looks like new. I was able to cut off the reinforcing brace where it was really solid and think I can bend a new one and weld on like the original.
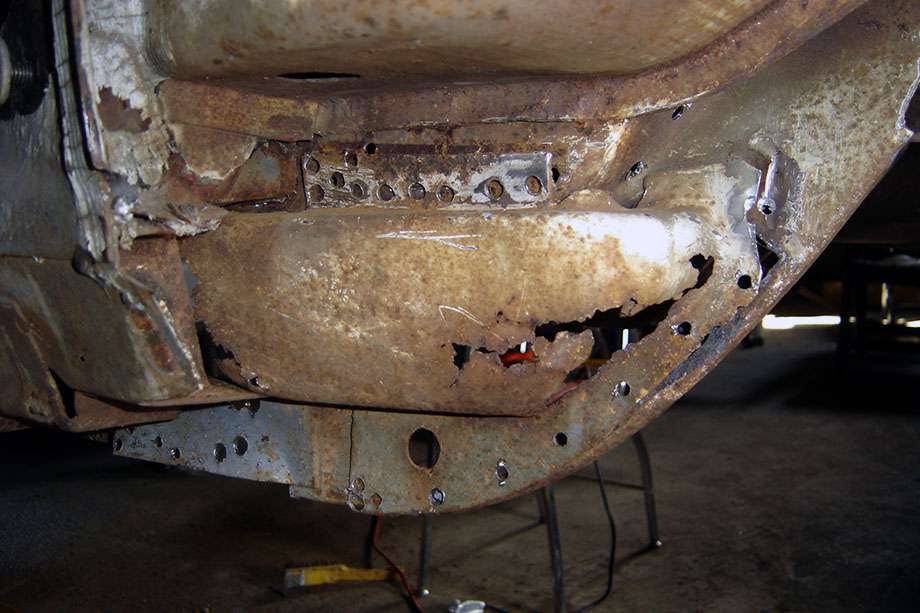
Front cowl support, this is what I saw when I got the car and knew I had work ahead.
Had a bit of rust in the middle of this other brace, didn't want to try and make the flange on the edge and it was solid so decided to just put good steel in the middle of it.
After seeing the odd shape of the cowl support and wondering how I was going to make one I decided to salvage the upper portion since it was in great shape and just fab new steel and make the lower portion. I've seen pictures of these supports that were squared off but I wanted to try and keep the original curved look if possible.
Work in progress but so far I like the fit. A bit more work on it to add the lower flange then maybe start reassembling and work my way back out. At least I found solid steel to build on, will sandblast everything and coat it with some rust converter stuff and spray everything good with epoxy primer and hope it will outlast me before it falls apart.

Another day tomorrow, waiting on parts for my dumptruck so I have a couple days to work on the car and hopefully make more progress. Think someone on here already warned me this will be the most challenging part but want to do it right.
Dennis, Chris and Jake
I still think the overall body on my car is pretty good but I'm finding that there are certain areas on these Impalas that are prone to rust and to do it right you have to peel back quite a few layers to make sure you get all the bad spots repaired. I've never attacked anything like this before on a car but do like to fab and build things around the shop.
After a visit to Lutty's and bringing home two new floor pan halves (easier and cheaper to get them both and then cut out the small sections I'll need), new front one piece floor brace, floor shifter hump and two new rear body mount boxes I had enough to get started. I was hesitant at first on cutting out the floor and wanted to keep it as small as possible but soon found that with some planning it was easier to cut out a large section to get to all the bad areas around the front cowl area and front part of the inner rocker panel.
After getting the floor cut out I found the inner rocker was going to need a lot of repair. At least to me and my first venture into this I had to lean back and form a plan. HELP, but of course Chip Foose didn't come running so I had to continue on my own. Chris has avoided this part so far, waiting to see how it progresses before coming out and helping on this part.
Ready for surgery, I think.
Got the front brace removed, both ends looked like this so lots of work ahead.
Before cutting out the floor I started drilling out spot welds and slowly started in.
Kept looking worse the more I opened it up.
Time to open up the floor.
Digging still deeper, the brace inside this area was gone. Hope to find pictures to see what it was supposed to look like in there.
Front cowl area, think I can make these parts.
After getting all the rusted pieces out and cleaning it up the inside of the outer rocker looks like new. I was able to cut off the reinforcing brace where it was really solid and think I can bend a new one and weld on like the original.
Front cowl support, this is what I saw when I got the car and knew I had work ahead.
Had a bit of rust in the middle of this other brace, didn't want to try and make the flange on the edge and it was solid so decided to just put good steel in the middle of it.
After seeing the odd shape of the cowl support and wondering how I was going to make one I decided to salvage the upper portion since it was in great shape and just fab new steel and make the lower portion. I've seen pictures of these supports that were squared off but I wanted to try and keep the original curved look if possible.
Work in progress but so far I like the fit. A bit more work on it to add the lower flange then maybe start reassembling and work my way back out. At least I found solid steel to build on, will sandblast everything and coat it with some rust converter stuff and spray everything good with epoxy primer and hope it will outlast me before it falls apart.
Another day tomorrow, waiting on parts for my dumptruck so I have a couple days to work on the car and hopefully make more progress. Think someone on here already warned me this will be the most challenging part but want to do it right.
Dennis, Chris and Jake

Odd how your floors are rusted where they curve upwards towards the firewall (is that the "toeboard"?) while mine are rusted right in the bottom. All 4 pans, but not so bad they won't support my weight standing on them. Wish I could just buy the two floor halves and pick them up local. Shipping would kill me on them.
My friend is about to start cutting rust out of my 61 in the next few weeks. He doesn't like to do it, but he's been out of a job for a few months and I'm taking advantage of that......ummm.....I mean I'm helping him out. Seriously though....I let him set the price of his labor and he really is a good friend. Spent all my patch panel money on 409 parts though. Gotta sell more stuff. It never ends.
My friend is about to start cutting rust out of my 61 in the next few weeks. He doesn't like to do it, but he's been out of a job for a few months and I'm taking advantage of that......ummm.....I mean I'm helping him out.
Seriously though....I let him set the price of his labor and he really is a good friend. Spent all my patch panel money on 409 parts though. Gotta sell more stuff. It never ends.HOLEY cow Dennis, {no pun intended } , my car wasn't that bad ,but i did have to do bracing also and floor corner's shaped them and welded in. My inner rocker's rusted behind brace's only, so i did not have to replace all of it. You will find after doing one side other side will be easier to figure out how to do . Hint,,, when replacing box mount's behind rear wheel's pay close attention to old box mount's use reference mark's of height, so body set's on mount's even, and in and out position , in order to line back up with hole's in frame , i was off on one of mine about a 1/4 inch on one side ,but still bolted ok.