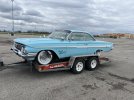
Fawn Memory- 61 Impala bubble top with a stroked 409

hot_rod_hooligans

Well Known Member
Well, we made it back in one piece, and the car did too(for the most part). Just over 2,000 miles, over 10 days, and 6 states. The trip definitely didn't go the way I had hoped it would, Dad decided after the 4th day of the tour he had had enough, so me and my nephew decided to finish the tour without him, and a surprise turn of events ended with us doing the last leg of the tour with my mom.
The toll of the trip was fairly minimal: lots of scraping due to having probably an extra 400-500lbs in the car, resulting in the welds on one of the "dummy" drag pipes breaking and the pipe breaking off, lost one of the spider caps somewhere in Ohio, LOTS of rain and water leaks, a leaky water pump gasket, a gallon of antifreeze, 2 quarts of oil during the trip and an oil change when we got back, and a set of spark plugs trying to diagnose what felt like a misfire issue after the first day, reassured after we dyno'd it on the first day of the tour(day 3) and it only made 265hp to the rear wheels. We were finally able to get a timing light on it on day 3 of the tour, and found the timing was 2* retarded from TDC. We advanced timing 13* and swapped metering rods, and put it on the dyno again to get it up to 300hp-435ft/lbs. Before the tour was over I called up Edelbrock and have the big port intake, 800cfm AVS2 carb, and new fuel pump on order, the intake is on back order till August so we have some time to prepare lol.7B6907C5-1DAA-4D75-9340-7E84D7A24FAB.jpeg54FB255C-08CE-4782-B9D4-D0CC2DCAFB11.jpeg385214F2-127D-4E35-A680-192CF32E1A1A.jpeg801D4436-86CA-4968-90C5-66B91627B04B.jpeg5A5A38CE-ADD2-47C1-B0A0-CD7E14B59D62.jpeg91DD188A-1713-4409-8ED2-6D00C378A0B7.jpeg15CD8121-9F7A-4CF3-8C34-2E4AE4B85B1C.jpeg
 
Last edited:

hot_rod_hooligans

Well Known Member
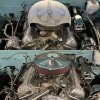
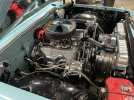
Ok, time to update this. New intake, carb, and an air cleaner that will actuall flow air, were finally installed late Spring of 2020, I spent a good portion of my COVID lock down polishing the intake, and porting and polishing the intake runners. It's not perfect, but it looks a lot better than the cast finish. While swapping the intake and tuning the carb, we found out the vacuum advance was also not working, and was able to diagnose a fueling issue that was still persistent even after the carb swap. Diagnosis is the stock 5/16" fuel lines are insufficient to keep the motor fed. So I have all new 3/8' NiCo fuel lines, nylon braided hoses, AN fittings, and an electric fuel pump going in(also as a half step twords EFI later down the road). Another issue I found tunning the car is the factory valve covers my Dad was adamant about keeping, and the aluminum spacers he was using so they would clear the roller rockers. The spacers required two gaskets(head/gasket/spacer/gasket/valve cover), double the gaskets, double the oil leaks. Every once and a while we were tuning the engine I'd see a puff of smoke coming from the headers with the smell of burning oil, figured it was oil dripping on the headers, then I was possitioned to actually see it happen AND the resulting FIRE BALL. New high clearance valve covers were ordered.
89F59E87-2713-4A0E-A684-2963D325A266.jpeg
Then all work came to a screeching halt from June 2020 until my Dad passed away last Aug. Long story, but the car is finally in my posession and safe with me and my sister. It sucks not having him around, but I like to think he's hanging around whenever I work on the car. He might not like everthing I've done, but I'm a firm believer there is more to a car than just looking pretty at a car show, it needs to work well when you want to drive it too.

So since I've taken possession, the new valve covers have been installed(still considering painting the cast parts between the aluminum fins either white or Seamist Auqua, to both tie them into the rest of the car, and make detailing them easier).... and had to have the hydroboost rebuilt due to an error on my part trying to move it out of the way to get to the drivers side valve cover. :doh
4AC018B1-9F9D-4D02-B4E6-3940A8F2E8D0.jpeg
15F0375B-C1C4-4BE0-9477-87F5F781DF7E.jpeg
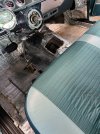
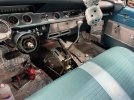
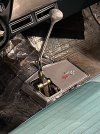
Then the steering column stated having issues, where the "gate" that you have to go through from P-R-N-D was moving around inside the column. I attempted to figure it out, but was a point I decided it wasn't worth digging deeper since ultimately I wanted to swap a tilt column and convert to floor shifter, like a true SS should be. I decided to go with Lokar, prefered a case mount but I really didn't want to have to drop the transmission and then figure out how to locate the hole to cut for the shifter, and I wasn't sure I'd be able to getthe offset to the drivers side like the factory 4 speed, so I tied to cut a corner and go with my second choice, a floor shift kit. Lesson learned... don't cut corners. After lots of swearing, some cutting and grinding that really didn't get me as close as I wanted, and lots of procrastination, I had to suck it up and switch to the case mount shifter. The floor mount assembly is just too tall an too wide to install cleanly with the SS shift bezel, even after cutting the floor to mount it on the underside of the pan. The pivot point is just too wide to sit that high and use the SS bezel. Now I still don't think I like the fitment with the SS bezel and the case mount shifter, since the shifter is now centered on the tunel, but I think I will be able to live with myself if I don't use the bezel. Besides, most people who look at it probably won't catch it at first glance, if at all. Ultimatly I just want it to look like it could have came that way from the factory, even though it didn't.
696E366D-47DE-4ABF-B115-39462F75F50F.jpegBAD0EB7C-E72D-4CE5-80AA-5430FDB4F9BD.jpeg2350E0FF-C2A4-449D-8C70-E4FDCB403397.jpeg33CF3512-24FB-43D8-AA4A-4BF9EB8857CA.jpegE0BCA1BC-8BED-4DE0-B9EB-514A4FC232E2.jpeg
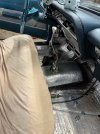
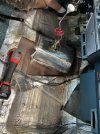
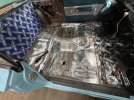
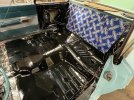
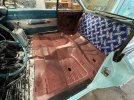
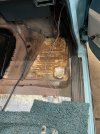
On to the current project. While pulling carpet up(which I need to replace now since I've already cut a hole on the side of the transmission tunnel for the floor mount shifter), and removing the fiber based sound/heat insulation my dad used 17 years ago, so I could weld in the transmission tunnel patch panel and POR15 it, I found that water has been leaking in and getting under the insulation. The drivers side had some sort of rust inhibitor coating that, while it has kept the floor from rusting, has been peeling up. I'm not sure what he used, but it has kinda a rubbery/latex feel to it. I remember him using the suff, looked like thinned Elmers glue when it came out of the bottle, but would turn a very dark blue/purple, we had used something similar in the Navy. The passenger side hadn't been treated and had a decent bit of surface rust, from either the windsheild leaking, and/or the short time that the evap drain on the HVAC box had broke off and was draining into the interior. So right now the front floor pans, transmission tunel, and firewall are getting POR-15 Rust Preventive Coating and POR-15 Red Oxide top coat, and Dynomat sound deadener. I'll tackle the rear floor pans when I get the new carpet since the back seat has to come out to remove it, then finally I'll tackle the trunk. I just hit the floor pans and tunnel with the Rust Preventive Coating last night, and decided too late that I was going to go ahead and do the firewall too while I was there(no half measures). So I hope to have the firewall POR-15'd and Red Oxide painted tonight, and then hopfully have the Dynomat done by Sunday.
76A969A4-486D-454F-9F60-98AC7CEB4251.jpeg534F1A60-110F-464F-BAB6-C47448C5FE6A.jpeg

I have to patch a half dollar sized hole in the exhaust coming off the drivers side header, right behind the wheel, where the dummy drag pipes Dad had welded onto the exhaust finally broke off after taking repeated hits while on the Power Tour(like I mentioned above, we lost the passenger side while on the tour which I reluctantly welded back on once we got home, a bit too well looking back now), so I can get it back up to the shop and get it on the 4 post lift to replace both pipes and delete the drag pipes. I know Dad really liked having them, but they are causing more headaches than they are worth, especialy being non-funtional, to keep them. The updates to the fuel system will be taken care of the same time.
 
Last edited:

hot_rod_hooligans

Well Known Member
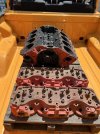
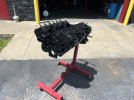
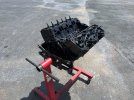
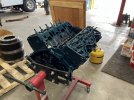
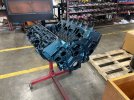
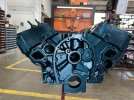
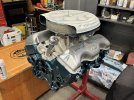
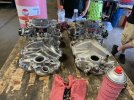
I also wanted to show off what I’m doing to preserve the parts my Dad painted for the engine. This will now become the home of any parts I pull off the engine to upgrade.

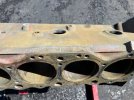
Picked this up for $50 with a cracked block at the water jacket. Stripped, sealed with POR15, and painted with the same color Dad used to paint the one in the car.

869A0380-C71C-4CD6-9755-3E87042976C5.jpeg942A2169-3D17-4398-9263-D5233B368B20.jpegB41097BD-A51C-4584-B287-4D4DBF29968E.jpeg4A835686-F5F3-4319-BC54-BC1DB911698B.jpegA153455D-D278-4339-B15B-EFEE8B1742C2.jpeg4A572DC4-341C-4E5E-92AF-B5EE3E73DAD3.jpegC5D1861C-00AF-4EFC-A4C8-B5CF2A8AE4B5.jpeg62AD7E83-1751-420D-8CBF-2D1AD99D394F.jpeg
 
Last edited:

hot_rod_hooligans

Well Known Member
New carpet and Dynapad showed up, so once it warms up, or if I can get time to get the shop insulated a little beter, I'll get started on pulling carpet and POR15 the rest of the floorpan. I'll likely hit whatever interior metal I come across as well. I know they never painted things like the sub structure of the dash from the factory, and it's lasted this long, but my OCD demands I get it sealed up and protected. She's been in the family for over 40 years, I want to do what I can to make it lasts for at least another 40 years.

On a side note: Proud Uncle moment here. My nephew, who will be inheriting the car when I'm gone, took up my Dads profession and is doing custom paint and bodywork, he started a little over 5 years ago right out of High School working at a little body shop doing collision repair, then got picked up at Raleigh Speed Shop a little over 4 years ago. Last year he moved out to Hunington Beach to persue a dream job working for some guy named Chip, but it didn't work out(apparently it was horrible timing). He stuck it out working for another body shop near by, and doing side work on the weekends, until he was recently approched by a little company called Singer Vehical Design near LA that does some pretty cool stuff with Porsche 911s, made him a job offer. So I'm confident the car will be in great hands when I'm gone
 

hot_rod_hooligans

Well Known Member
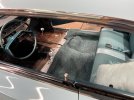
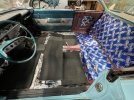
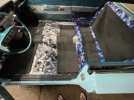
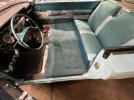
Finally starting to go back together. Unfortunately I have to pull the seat bottom back out so I can reinstall the seat belts, but that's not too difficult A8AAB380-0B41-4A96-9B3D-99FA80B57DE9.jpeg2FCC73DA-F6AF-4017-8A61-F11347AD85DC.jpeg95EACC4A-B78E-4E8D-96CC-3CB416FE7E4B.jpeg0CBD816E-E894-49A5-8DD1-8F71AEE9A817.jpeg247FA9E8-42BB-4B02-9371-26FDDC86AC2C.jpegF23DDA1A-77C3-44D8-AC80-081101167260.jpeg
Going to have to finish out the top of the trans tunnel between the front and back seats with the Dynapad, the carpet is a bit loose, but I’m really looking forward to see how much of a difference the Dynamat made.

Goal is to have everything buttoned up for a Cars and Coffee on April 22nd at Lucas Oil Raceway, they are going to have the track open for “fun runs”.

The trunk is likely going to be my Fall/Winter/Spring project.
 
Last edited:

hot_rod_hooligans

Well Known Member
Well, looks like the Cars and Coffee may be a wash out, high of 55° and 80% chance of rain. Spent the weekend detailing the interior, washed it and hit it with the clay bar, going to wax it tomorrow.

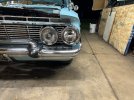
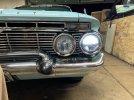
Saw that the passenger side low beam bulb exploded, the H4 housing appears to have gotten moisture in it. I had Hella 80w/100w H4 Xenon bulbs and upgraded headlight harness, based on the scorch marks on the headlight housings, they get too hot for the glass lense/plastic housings my Dad brought. Been looking around for a clean, subtle looking LED headlight housing for a while anyway, and decided to try out United Pacific. They’re a bit more than several other options out there($130 each) but they were one of the only ones I found that didn’t look completely obvious that they were LED, had a chrome reflective surface, and didn’t have some kind of halo/bar daytime running light. (Please ignore the finish of the bumper, after we got back from the Power Tour Dad tried cleaning the bumper with a Scotch Bright pad, scratched the hell out of the front bumper and lower bumper pans. I haven’t had any luck trying to polish them out yet. Going to let the professional- IE my nephew, take a stab at it)57A919A0-A904-486F-A376-BE3EC7C663DF.jpeg910A5478-EE45-4D13-B378-37AF7DCE5286.jpeg

On another note I came across these at work, we recently became a vendor for Fedpro(Tub-O-Towels/Free-All) and they had samples of their chrome cleaner to try out. I was highly skeptical but seeing how we are supposed to try and sell this stuff, what better way to see how well it works than on the car. The wipes by themselves do a pretty good job of cleaning the chrome, but leaves a haze(almost like wax) behind. And just like wax, if you buff it off with a microfiber cloth, holy crap does it really look good.
963728EB-AB76-4FDE-9236-AA1A773296C2.jpeg
It’s not a great picture to show off the chrome, a local kid who’s trying to start his own detail business and has been helping me clean up the car took this.620F8F12-5701-4FB7-A915-A1AB9C698C77.jpeg
 

55Brodie

Well Known Member
The divider piece between the 2 headlamps shown above looks wonky to me. Is it installed upside down?
 
  • Like
Reactions: 327

hot_rod_hooligans

Well Known Member
The divider piece between the 2 headlamps shown above looks wonky to me. Is it installed upside down?

Yes something is not right with that divider.
Not uncommon for this in reflection style LED headlights, the upper half is your low beams, the lower half of high beams. Gives a very clean and defined cut off to keep from blinding oncoming cars, and these things are BRIGHT. I thought the Hella lights were bright at 100w, but compared to the LEDs, it’s like you are trying to use an old incandescent bulb flashlight.
 

blkblk63ss

Well Seasoned Member
Supporting Member 5
Not uncommon for this in reflection style LED headlights, the upper half is your low beams, the lower half of high beams. Gives a very clean and defined cut off to keep from blinding oncoming cars, and these things are BRIGHT. I thought the Hella lights were bright at 100w, but compared to the LEDs, it’s like you are trying to use an old incandescent bulb flashlight.
They are talking about the grill insert between the headlights . Say it looks wonky,whatever that means . I say it's not the same level as center grill.
 

55Brodie

Well Known Member
They are talking about the grill insert between the headlights . Say it looks wonky,whatever that means . I say it's not the same level as center grill.
 

hot_rod_hooligans

Well Known Member
Ah, yeah…. I realized last night that at some point, I’m assuming when Dad had the grill chromed, someone removed all the rivets holding the three pieces together, now the “grill” section is only attached to the outer ring. I have to make a hardware trip for stainless screws, since I’m missing several, and I’m picking up some stainless rivets.
 

hot_rod_hooligans

Well Known Member
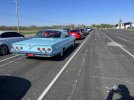
Well it wasn’t a wash out, just cool and windy. Still managed to bring the suck.
6270504D-5D8C-4946-B865-55CC78197C78.jpeg
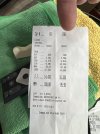
Soooo…. Carnage report. First run was a hot mess, the car died as soon as the light turned green and hit the gas, was still able to spin tires halfway down the track . At least the engine was running good. Really the only reason I ran it a second time was I just wanted one good run to get a baseline performance number. Turned out to not be a horrible run. Could have been better. Turned in a 16.33@85.95mph. The cost? A bad engine knock with hints of metal on metal squealing at the end of the track that mostly disappeared after about 45 seconds.

1D2B502C-8980-441A-AF50-004A81B27D97.jpeg
93ACF4A6-5712-4181-B107-BD46D726B681.jpeg

Pending a full tear down, educated guess leads me to believe that there is a oil return issue and spun a bearing due to oil starvation. Steve Kline out of Anderson, IN was the engine builder, he came highly recommended by several of my dad’s buddies in the area, all with hot rods. I wasn’t involved in the engine build, I don’t know the full scope of the parts used(I think a lot of the parts were ordered from Show Cars), and I don’t know how much attention to detail was given to the engine block to things like make sure a high volume oil pump has sufficient work done to the oil passages to get it back to the sump.

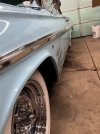
It sucks but I think this is going to put me down for a couple years. It will be better off in the long run, as I plan to let my OCD run wild and address any issues I come across like rust spots on the firewall and frame, cleaning up the wiring, repainting the engine block, and squeeze in some wants like porting and polishing the heads and oil passages, painting the rough casting between the fins on the valve covers Sea Mist Turquoise, mostly to make cleaning them easier, as well as tie it into the rest of the car a bit more.
 
Top