
Here are the SS insert set of 6 pieces for $ 239 from Dallas County parts
https://www.ebay.com/itm/NEW-1962-C...584270?hash=item56d62ee24e:g:hr0AAOSwaNBUbi-l
Note that he recommends the 3M # 4920 tape -this is 15 mil tape( I think the 15 mil tape is thin, from me and others on the forum such as Dave in Michigan who had his red 62 SS 409 done with 3M tape that was thicker).
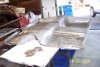
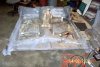
If the SS metal pieces you have are not cut to fit the Impala trim, I don't see how they would work. The 6 inserts you buy are cut to fit in the painted area of the impala trim. The rear 1/4 SS metal insert pieces are right at 6 ft long, the fenders and doors at least a 1 ft shorter and a different width(the fenders are tapered in width)
One thing the SS tape((Not metal) sold is junk, it will not stay in place on the edges (I have seen 2 friends cars were its failing). It also turns yellow or gold in color.....
Paul
https://www.ebay.com/itm/NEW-1962-C...584270?hash=item56d62ee24e:g:hr0AAOSwaNBUbi-l
Note that he recommends the 3M # 4920 tape -this is 15 mil tape( I think the 15 mil tape is thin, from me and others on the forum such as Dave in Michigan who had his red 62 SS 409 done with 3M tape that was thicker).
If the SS metal pieces you have are not cut to fit the Impala trim, I don't see how they would work. The 6 inserts you buy are cut to fit in the painted area of the impala trim. The rear 1/4 SS metal insert pieces are right at 6 ft long, the fenders and doors at least a 1 ft shorter and a different width(the fenders are tapered in width)
One thing the SS tape((Not metal) sold is junk, it will not stay in place on the edges (I have seen 2 friends cars were its failing). It also turns yellow or gold in color.....
Paul
 I did not know there were so many


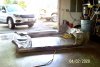


 That car is gonna be Kool, when finished. Great job, Cash.


 It looks like your having fun!!!
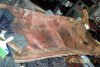
 I'm not to sure
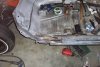
  After taking the passenger