You are using an out of date browser. It may not display this or other websites correctly.
You should upgrade or use an alternative browser.
You should upgrade or use an alternative browser.
409 Stroker build
- Thread starter Mongo
- Start date

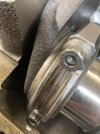
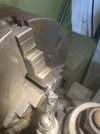
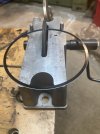
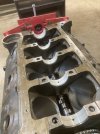
After figuring out the exact pushrod length I need I found that at maximum lift I only had about.020 clearance until the exhaust valve made contact with the cylinder
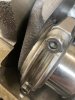
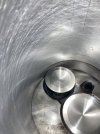
So I marked where each exhaust valve was making contact then I made a small modification to that area in order to get more clearance
So I marked where each exhaust valve was making contact then I made a small modification to that area in order to get more clearance
Attachments
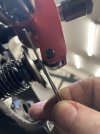
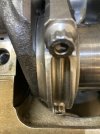
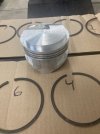
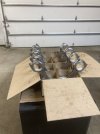
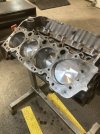
Next I Miked all of my new pistons to make sure that they were all perfect then I set my Bore gauge to be zero at that measurement then checked each bore
I’m coming up with.0035 to.004 clearance
And the Ross pistons that I have call for a minimum of.003 so I should be good to go
I’m coming up with.0035 to.004 clearance
And the Ross pistons that I have call for a minimum of.003 so I should be good to go
Attachments
That is a "captive" bearing, washers & bearing are all in one. There are timing sets made with this bearing that do not require modifications. In Mongo's case he was saving his block. Looks like he has it figured out.The bearing should have washers on both sides. Oil groves not needed. Just would be ways for oil to escape and not lube bearing.
Thats exactly where I was going Dan. Your one smart sum bitch.I would want more clearance than that. Plus giving it more will help exhaust flow. Win win.
My cat’s name is mittens.Thats exactly where I was going Dan. Your one smart sum bitch.
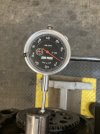
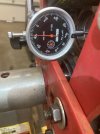
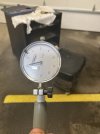
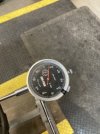
What was your end play? If it was the .0035 your indicator shows, that looks like on the tight side to me. If you would like to see more end play you might try loosening the back cap and prying the crank back & forth or whacking each end with a large dead blow to help "align" the thrust faces of the rear bearing. Could possibly get you some more movement.
Jeff
Jeff
Well I guess that 30 years ago I must have thought that I was an Engine builder but nothing could be further from the truth
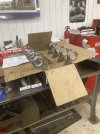
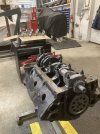
When I pulled my motor apart and found that the cam had walked into the block I figured that I might have gotten the cam end play wrong ( it was 30 years ago so I really don’t remember if I even checked it) so now I know for sure that I didn’t. I don’t think that I even owned a dial indicator so this time when I went to check it I didn’t even get the timing cover bolted in tight before my end play went to zero so I had to machine my cam button down to get the proper end play
When I pulled my motor apart and found that the cam had walked into the block I figured that I might have gotten the cam end play wrong ( it was 30 years ago so I really don’t remember if I even checked it) so now I know for sure that I didn’t. I don’t think that I even owned a dial indicator so this time when I went to check it I didn’t even get the timing cover bolted in tight before my end play went to zero so I had to machine my cam button down to get the proper end play