Weiand 8004 + What Carb?

SonOfThomp

Well Known Member
OK, getting a used Edelbrock 1406 today. So, I can get this intake/carb swap done, at last.
Question: although I'm sure I can muddle through this, as I actually did it - once - a thousand years ago (OK, maybe 30), but is there a link to a step-by-step, or a PDF anyone knows about? Making it easy, easier, even easiest is GOOD, you see.

Many Thanks
SoT
 

dq409

Well Known Member
Supporting Member 3
OK, getting a used Edelbrock 1406 today. So, I can get this intake/carb swap done, at last.
Question: although I'm sure I can muddle through this, as I actually did it - once - a thousand years ago (OK, maybe 30), but is there a link to a step-by-step, or a PDF anyone knows about? Making it easy, easier, even easiest is GOOD, you see.

Many Thanks
SoT

???? For what? Installing a carb? If so, no probelm,, it`s all stright forward.
You really should not need a book.
Install instructions:http://www.edelbrock.com/automotive_new/misc/tech_center/install/misc/Intake_Manifold.pdf

As far as jetting goes,,:
http://www.edelbrock.com/automotive_new/mc/carbs_acc/pdf/carb_owners_manual.pdf
 

SonOfThomp

Well Known Member
???? For what? Installing a carb? If so, no probelm,, it`s all stright forward.
You really should not need a book.
Install instructions:http://www.edelbrock.com/automotive_new/misc/tech_center/install/misc/Intake_Manifold.pdf

As far as jetting goes,,:
http://www.edelbrock.com/automotive_new/mc/carbs_acc/pdf/carb_owners_manual.pdf

Sorry I was unclear. I'm switching intake and carb, from 283 - 2v to a Weiand 8004 and Edelbrock 1406. And it does seem rather straightforward, but I haven't done this in years and was looking for an east step-by-step in order to make it as easy as possible.
Looks like you provided some great info, thamks!
 

SonOfThomp

Well Known Member
Ok

The intake (Weiand 8004) and Eddy 1406 are on, and the latter has some plumbing issues, so to speak. To refresh, the original carb was a Rochester 2Jet.

Choke: The old carb had a simple tube that ran down to the exhaust manifold. The new carb has an electric doo-dad (a.k.a. electric choke) on the passenger side. What do I need to connect the choke (a.k.a. electronic doo-dad) to the motor?

Vacuum: See link:

http://www.digitalcorvettes.com/forums/showthread.php?t=100434

If I use "A", and block off "B", what to do with the one in the center?

Help Appreciated
SoT
 

dq409

Well Known Member
Supporting Member 3
The intake (Weiand 8004) and Eddy 1406 are on, and the latter has some plumbing issues, so to speak. To refresh, the original carb was a Rochester 2Jet.

Choke: The old carb had a simple tube that ran down to the exhaust manifold. The new carb has an electric doo-dad (a.k.a. electric choke) on the passenger side. What do I need to connect the choke (a.k.a. electronic doo-dad) to the motor?

Vacuum: See link:

http://www.digitalcorvettes.com/forums/showthread.php?t=100434

If I use "A", and block off "B", what to do with the one in the center?

Help Appreciated
SoT


Just run a hot wire to the choke. As it warms up it will come off choke.
Got this one - it's the PCV port. Does it matter whether I use that one, or the one on the intake?

No,,,
 

Fathead Racing

Well Known Member
Supporting Member 7
Real performance engines run manifold vacuum to the vacuum advance unit. Use the lower vacuum port on the driver side. Timed vacuum was used to lower NOX emissions at idle.
 

dq409

Well Known Member
Supporting Member 3
Real performance engines run manifold vacuum to the vacuum advance unit. Use the lower vacuum port on the driver side. Timed vacuum was used to lower NOX emissions at idle.

:roll I guess I should have "opened" that link !!:doh

It was a little confusing the way SoT worded that.

Fatride is correct on the small A-B ports and the large port is for PCV or Power brakes.
 

SonOfThomp

Well Known Member
Nucking FUTS

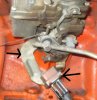
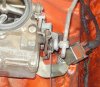
Granted, I haven't done much mechanickin', and it's been a few decades since, but this intake switch has been much more difficult than I thought. It's the little things. Like the brackets for the aftermarket A/C, specifically. Getting all the bolt holes to line up left me wondering if the thing was really on the motor in the first place, or if I only imagined that it was. Biggest thing there was that someone used a metric bolt to anchor the bracket onto/through the intake (needed a longer one). Apparently, it went in no prob, but ruined the bolt AND the hole in the process. How long do you think it took a newbie to figure that one out? Off came the intake, and re-tapped the hole. Then, a host of little things I'll leave a mystery.

OK>

The thing now is that the distributor won't go back in the position it was in when it came out. I am pretty certain that the engine wasn't turned (battery even disconnected, like ya do), and I was very careful not to move the distributor, having bumped the ignition until the rotor pointed straight back at the firewall (we'll call that 12 o'clock), which I then duly marked. So, now it pops into the two o'clock position, and peering into the hole, I see that the little bar that engages with the shaft is in a position making it impossible for it to go back into 12 0'clock.

What the hello? Am I daffy, or could the motor have turned somehow?
 

dq409

Well Known Member
Supporting Member 3
The thing now is that the distributor won't go back in the position it was in when it came out. I am pretty certain that the engine wasn't turned (battery even disconnected, like ya do), and I was very careful not to move the distributor, having bumped the ignition until the rotor pointed straight back at the firewall (we'll call that 12 o'clock), which I then duly marked. So, now it pops into the two o'clock position, and peering into the hole, I see that the little bar that engages with the shaft is in a position making it impossible for it to go back into 12 0'clock.

What the hello? Am I daffy, or could the motor have turned somehow?

No,, this is just a common thing,,

Set the rotor to the 12 o'clock position then look at the bottom of the distributor shaft and note the position of the blade.
Then look into the ditributor hole and note the position of the slot on the oil pump shaft.
Take a large flat blade screw driver and turn the slot to match the dist blade.
You might have to do this a couple times to get it right.

Next time make sure you bring the timing mark to top dead before you remove the dist.
This way if the engine gets bumped you will know exactlly where your starting point was and if this happens it will save a bunch of time.
 

SonOfThomp

Well Known Member
No,, this is just a common thing,,

Set the rotor to the 12 o'clock position then look at the bottom of the distributor shaft and note the position of the blade.
Then look into the ditributor hole and note the position of the slot on the oil pump shaft.
Take a large flat blade screw driver and turn the slot to match the dist blade.
You might have to do this a couple times to get it right.

Next time make sure you bring the timing mark to top dead before you remove the dist.
This way if the engine gets bumped you will know exactlly where your starting point was and if this happens it will save a bunch of time.

THANKS
I'll give it a shot and let you know if an old dog can, in fact, learn new tricks.

Cheers!
 

SonOfThomp

Well Known Member
Hats Off, dq409

Worked like a charm first try. :bow

THEN
there's the solenoid for the O/D unit. Forgot all about that, was on a tlny bracket attached to the carb via driver's front carb bolt. I can see where it plugs in, what with that wire and all that has no place ELSE to go . . . . but how does it 'activate'? can't see anything but the prongs for the plug. It's on the carb for a reason, I would presume. Does the linkage activate it, somehow? Should've taken pictures.

Cheers
SoT
 

SonOfThomp

Well Known Member
Should've taken pictures.

Turns out I did, after all. Nothing seems to be touching the unit, just seems to be mounted on the carb's base and that's it.

Is this correct? If so, it should go on the Edelbrock with no trouble, yes?

THANKS
SoT
 

Attachments

  • OD.jpg
    OD.jpg
    77.3 KB · Views: 37

SonOfThomp

Well Known Member
Aye, she moves again under her own steam. Some tuning issues remain, but I pretty much wrapped it up this morning.

THANKS
for all the helps!

Cheers
SoT
 
Top