
You are using an out of date browser. It may not display this or other websites correctly.
You should upgrade or use an alternative browser.
You should upgrade or use an alternative browser.
Fixin a Ronnie Russell Stroker..
- Thread starter plumcrazy
- Start date
Oh boy oh boy, new toys!! Rockers and rods sleeping in their bath until this weekend, and new dial indicator means we should be able to throw the trans back in the truck. Big weekend, let's see how many new cuts and bruises we end up with, ha..
Attachments

![20171206_181448[1].jpg](/forum/data/attachments/57/57365-19f93befab5125cebd3706dc6296fb98.jpg)
Well, lots of activity yesterday but almost all on the truck. We did get a chance to put one rocker on and she looks good, so now a matter of rinse repeat..
In the end mounting the trans back up was a bear. The new pins caused the trans to not want to mount, and although they were in the holes, we had to put bolts in the block with washers to "suck it in" gradually and slowly. Eventually it pulled in, but were panicking because it was harder than it should have been. We put in the driveshaft, wiggled it, pulled it in a little more, didnt use a lot of pressure, didnt want to crack the aluminum housing, but couldnt get it to go without it..
In the end it was dinner time and on the bottom is a vid of us getting loopy looking for our last few bolts...
FYI - Our method for clocking a bellhousing, hope it helps someone.. . I know there's a couple methods to this but we went with the non-math simple way.
- Mount the bellhousing to the block, tq our bolts, mount the dial indicator so it couched the circle of the center hole in the bellhosing.
- Turned the engine clockwise, watched the gauge and look for the first moment we went from positive to negative. Clockwise on the reading and the second the dial started to go negative (counter clockwise) thats your highspot and we marked that spot with a big line.
- Zeroed the indicator, go around, watch for the highest and most negative number.
- That number, the highest, you divide by 2. So, .036 was us, divide by 2 is 18.
- Pick offset pins. We were 18 off, picked .021 and that brought us to .03 and within the .05 spec
- The new pins, you need to pop out the old ones, put the new ones in but they MUST be orientated to the way you made the mark for your high spot. SO for us, we had a 7 - oclock orientation, and our new pins went in with that orientation.
- Once your new pins are in, put the bellhousing back on, tq it, re-check the measurements. If its off, ours was still by a touch, grab and move the pins a "scoch" and recheck till your happy..
Yeaaaaaaaaaaaaa baby!! The trucks on the road! ha! What a day,, reassembling the odds and ends to get the trans remounted, installed the crossmember, driveshaft. We also drained the clutch rez and used this fancy new stuff with a 500+ degree boiling point. Please tell me if its not right, happy to drain and re-bleed.
http://www.pentosin.net/specsheets/pentosin_dot4_lv.pdf
We also drained the trans and topped off with Mobil 1 ATF to be sure and away we went!!!Check out the payoff video below. Now heres the big q, how do we know if the trans is ok? I didnt feel any vibrations, heard a few clinks and clanks but thinking someone knows a better way, ha!
What type of transmission is that?
Not sure it would take ATF fluid.
Not sure it would take ATF fluid.
What type of transmission is that?
Not sure it would take ATF fluid.
I was confused too when I read it so went with it. Never heard of it before...
k
Attachments
Is this a rebuilt transmission and is this the paper work that came with it?
Hi everyone, yes, this is a new unit and those were the the instructions.
Has anyone used this product for clutch fluid before? High boiling point and thought it would be good to use and have it in.
http://www.pentosin.net/f_brakefluid.asp
Has anyone used this product for clutch fluid before? High boiling point and thought it would be good to use and have it in.
http://www.pentosin.net/f_brakefluid.asp
I used to run Amsoil aft in a Muncie for my round track modified. That was mid 1990’s.

 Pushrods, that are for Guide Plates, will be Hardened on one end. They will usually say so. The hardened end, goes up.
Thanks Skip!
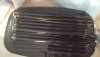
I had a new set of these from comp cam and thought, "why not".. They looked and measure to be same on both ends. I'm on their site and dont see them to be different, so installed them but have not put fire to her yet. I did have avery turn it over without the coil connected and all seemed ok, but when i rechecked i did fine a few needing more adjustment. I do hate not knowing how much to put on the poly-lock for pressure, thinking of a new gift for myself for christmas, tq valve adjustment wrench...
http://www.compperformancegroupstor...e_Code=CC&Product_Code=7928-16&Category_Code=
Last edited:
Quick Q on valve train turn-up...
If we want to make sure the rotating assembly is fine, geometry is right, locks arnt loose, lash is correct (I .10, E .14) thinking that pulling the coil and letting the engine rotate a few times will expose all the same issues as running, is this correct? Reason I ask, putting the offy covers back on and dealing with the booster is a PIA, so trying to check all the stuff before we commit to fire...
We did use assembly lube on the rocker rollers and tips. If the answer is yes, then should we also let the rotation go until we see pressure build and oil come through the rockers?
Interesting, we still have the plugs out and when we did rotate for a second, and i mean count 1-thousand 1, 1-thousand 2, we saw fuel squirt from #2 intake... Did not see the same blase out of the other cyls, is this normal?
Figured posting all this here can help others...
Thanks guye!!