62 Impala Project

chevy man

Well Known Member
Supporting Member 9
Welcome Topstrap: Looks like you chose the right car to build. The more solid the easier it is to do. Sure looks to me like this isn't your first rodeo :D
You might want to consider what Dan (tripower) suggested about powder coating your frame. In my opinion that's the best way to go. Good luck on your project. :clap
Ken
 

Bub6le 2op

Well Known Member
Supporting Member 6
Great job Dennis, I'm new to the site but i thought i would jump in, frame looks very nice:clap i like painting instead of powder coating because you can touch up the paint with powder coat you have a chip. again very nice

martin
 

Topstrap

Well Known Member
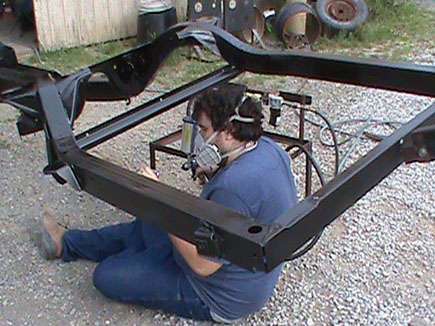
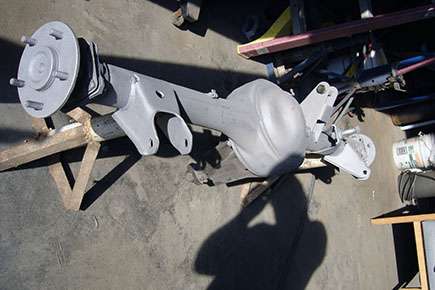
Got a bit of time and got started replacing some bad or pitted body mount metal. This is my first ground up and not sure at what point we can say good enough and leave it alone or redo it as best I can as I go so I won't start to want to shortcut anything. Finally got some Argon mix for my wirefeed and now it produces welds like I hoped when I tried using it with flux core wire.

Also not sure if it's appropriate to post small things like replacing these as I do things or just wait and show the big jobs and improvements. I know I did a lot of searching on the web before even starting something as small as these since I wanted to make sure I was doing it right. If I should skip the small steps please don't be bashful and let me know and I'll only show big jobs we get done.

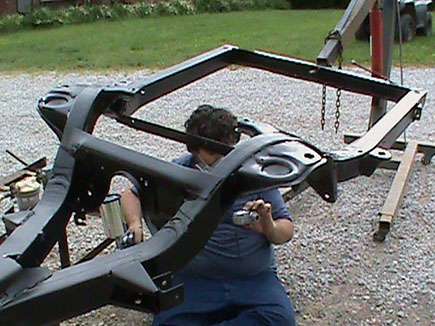
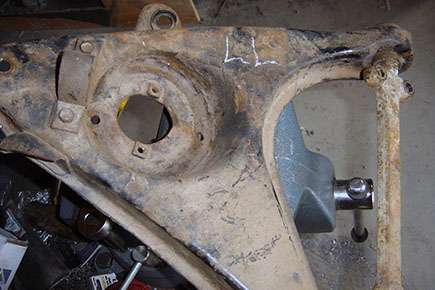
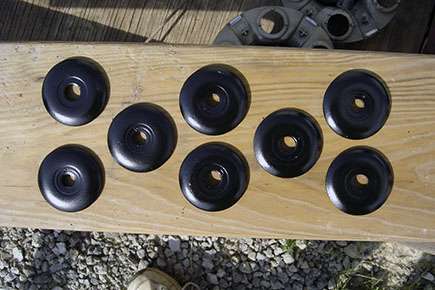
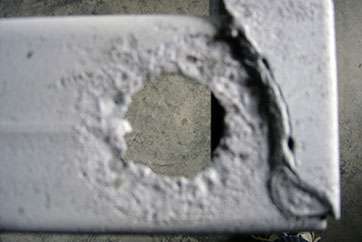
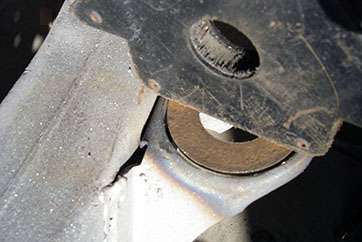
Only the passenger side rear mount was badly eaten away but I decided to make new pieces for all six of the rear mounts. The fronts were in really good shape with only a few very small pits under the rubber mounts.

badbodymounthole2.jpg

badbodymount3.jpg


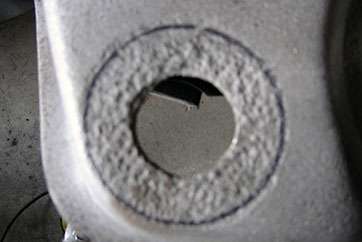
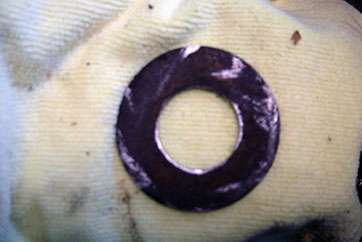
Found a piece of metal exactly the same thickness as my frame to make the new mount pieces from and used a hole saw to get the initial shape to start with for the round mounts.

metalforbodymount.jpg

metalcutwithholesaw.jpg


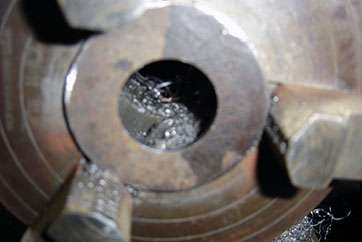
Then popped them in the lathe to open up the holes to what I needed to match the original mounts.

cuttingholewithlathe.jpg

finishedwasher.jpg


I probably could have found pre-made washers that would have worked but I want to make and do as much on this car as I can.

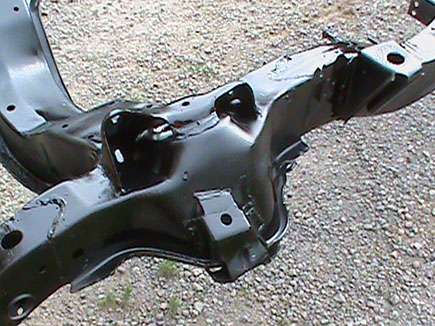
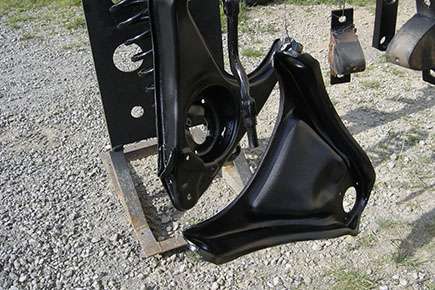
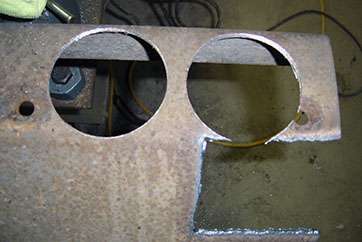
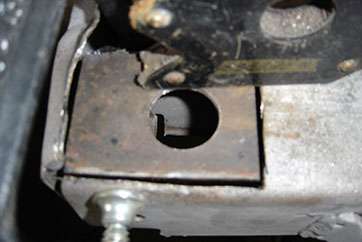
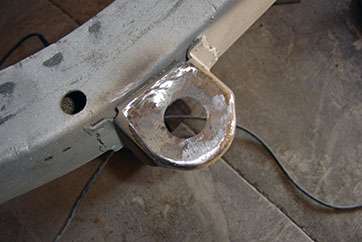
I cut our the whole piece and replaced it instead of making a round washer on both rear mounts. Still pretty happy the frame is in such good condition. Used a whiz wheel and cut out the frame and folded the rear cross section up to allow easier access.

cutoutrearmount.jpg

newrearmountinhole.jpg

newrearmountweldedin.jpg


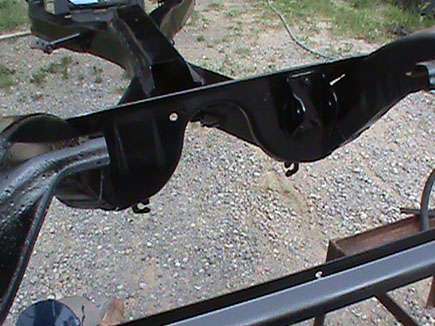
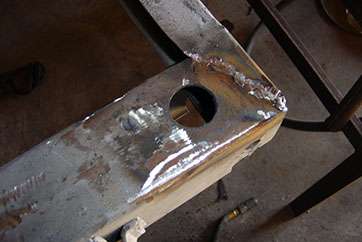
Cut the tops out of the other four mounts and used a magnet to hold them in position for welding.

finishedwasherinhole.jpg

anothernewmount1.jpg

anothernewmount2.jpg


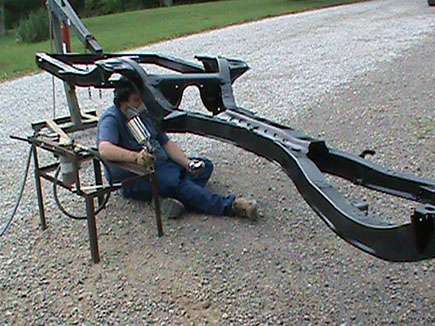
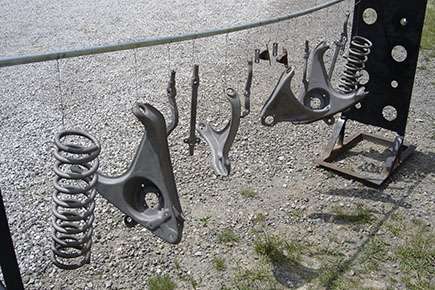
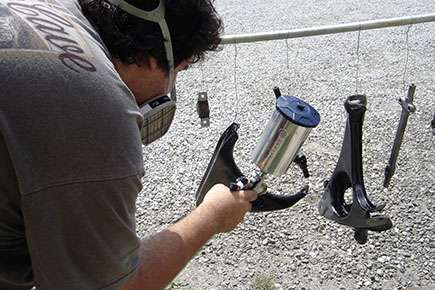
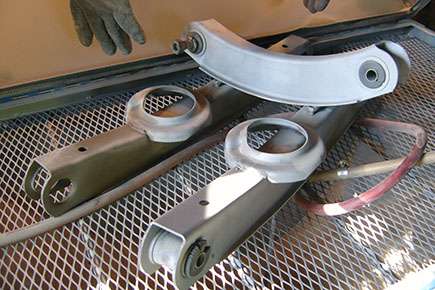
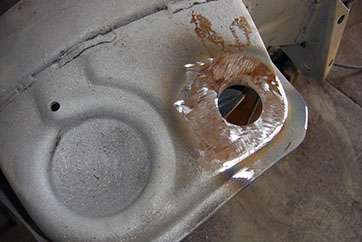
Ready to touch up a bit of the sandblasted body again on some spots I noticed I missed and get ready for the epoxy primer and black paint. We're pretty excited to start putting the new pieces back on and making progress. Think we're going to make a couple mounts for each end and set it up on saw horses so we can rotate it as we paint it to get total coverage.

Topstrap
 

LMBRJQ 60

Well Known Member
Supporting Member 4
Hey Topstrap,
Keep on posting:clap I for one like to look at pictures and see the different ways that people attack the same problems
We all learn new things

Steve
 

62impala409

 
Supporting Member 1
Way to go Topstrap. It is apparent that you have the photo posting part mastered as well as the fabricating. Nice job. keep the pics coming. I am afraid that most of us are pretty anal when it comes to restoring these old Chevys. I often feel like I am building the car for the next owner down the road because it will never wear out under my watch. Leo
 

Dick MacKenzie

Well Known Member
Supporting Member 9
Also not sure if it's appropriate to post small things like replacing these as I do things or just wait and show the big jobs and improvements. I know I did a lot of searching on the web before even starting something as small as these since I wanted to make sure I was doing it right. If I should skip the small steps please don't be bashful and let me know and I'll only show big jobs we get done.

Topstrap

I love it! The more you show the more we learn! Some guys have the skills to do what you're doing but a lot of us don't and enjoy learning how to do it. Keep up the good work! :clap
 

Topstrap

Well Known Member
I checked into powder coating and although it's a great finish I really wanted to do most of this ourselves so we decided to go the paint route. I didn't build my 32 Ford from the ground up and I've always felt I wasn't able to join in when others talk about all the work involved in redoing a car. My son is really enjoying it and has never worked on a car before and is looking forward to assembling and learning how to do it from the bottom up. Give a good feeling of pride as we accomplish each step and something we can share with each other and others.

I checked around and gave SPI a call and was really surprised that the President and CEO answered the phone. I explained to Barry what I was doing and how I'd prepped the frame so far. He got me all set up with what I needed and also saved me some money that I didn't need to spend on extras.

Amazing that he says to call anytime seven days a week if I have a problem and need a bit of guidance even on setting up the spray gun. It's nice to see this type of service from a company in todays world. I've also found this with some of the companies I've dealt with in my shooting hobbies.

Can't wait to get the stuff here, he mailed it today right after I talked to him. One more quick go over with the sandblaster for any missed spots and be ready to make it pretty. Can't wait :)

Topstrap
 

Topstrap

Well Known Member
Well, finally got everything together and a decent day with no rain till late in the evening so we decided to try painting. We've never painted or used a spray gun so this is another step in the learning process. Rigged up a bracket for the front with a round bar sticking out to rotate on and made a bar for the front of my engine hoist to hold the rear so we could rotate the frame while painting. Read a bit on how to adjust the spray gun and how to mix the paint, figured if we screwed it up we can always sandblast again and start over. Used the degreaser Barry sent and went over the whole frame, still no rain clouds so we carried it outside and set up the rigging and mixed the paint up and read the instructions while waiting the 30 minutes for the paint to do something before we could spray it.

Took a couple minutes after we got started to get the paint to come out nice and smooth and not too thick and also to figure out how fast or slow we needed to go to get a nice coverage. We had plenty and took our time and got quite a few coats, we kept rotating the frame and each time we'd see some tiny little spot we'd somehow missed the trip before. Finally we ran out of missed spots and even got about every small nook and cranny including inside the driveshaft tunnel and most all the little holes we could peer into covered. Not Barrett-Jackson and not scrub brush quality but somewhere in between we figure so we're pleased for the first attempt.

This is a big step for us being new to all of this and my son is really excited seeing it all one color and shiny.

chrispaintingframe1.jpg

chrispaintingframe2.jpg

chrispaintingframe3.jpg

chrispaintingframe5.jpg

chrispaintingframe4.jpg

chrispaintingframe6.jpg


I uploaded these the same time and thought maybe someone might enjoy seeing this vehicle. I'd never seen one before and the old fella said it was original and only a few were in this Country. He was at one of the local cruises we frequent and this was one of the first times out after restoration. Very nice and unique car.

greenpickupcar1.jpg

greenpickupcar2.jpg

greenpickupcar3.jpg

greenpickupcar4.jpg


Looking forward to seeing everyone up at Thompson, found out three of my neighbors go up every year. One had a beautiful all original 62 bubble top 409/409 he sold a few years ago. He'd had it for years and his story was he didn't have the money to hotrod it so he kept it original. It was a beautiful car and if I can get mine to look half as good I'll be tickled. Will try to find everyone up there and get lots of pictures and chat with everyone.

Topstrap
 

LMBRJQ 60

Well Known Member
Supporting Member 4
Hey Topstrap,
Good job on the painting, the same as most of us here, just have a go and see what happens.
If it isnt the required finish have another go.

Good work

Steve

PS what year is the coupe Ute have you got a front view?
 

Topstrap

Well Known Member
Added the front view of the car to my post. I'm not sure now what year he said it was. He had a copy of the original ad in his front window while parked but I think it might have been a 1937. Thought it was a one only year for the Ford. Nice fella and was real proud of it.

Topstrap
 

tripower

Well Known Member
Supporting Member 2
Added the front view of the car to my post. I'm not sure now what year he said it was. He had a copy of the original ad in his front window while parked but I think it might have been a 1937. Thought it was a one only year for the Ford. Nice fella and was real proud of it.

Topstrap
Its a 36 Chevy.
 

real61ss

Well Known Member
Supporting Member 8
Its a 36 Chevy.

It is a '36 Chevy and that little pick up bed was a factory option, you remove the trunk lid and the complete pickup bed slides in the trunk. There is an original one that shows with us at the AACA National Meets and there is a street rod that has one that shows up at the Myrtle Beach rod run. I think they also fit '37 & '38 Chevy coupes
 

Topstrap

Well Known Member
Got a couple days to work on the car and pushed out the bushings from the upper and lower control arms. Even using a press some were pretty darn stubborn. Using a combination of the press, hacksaw, chisel, punch, vise and assorted other stuff I could find did get them all out without damaging the control arms. Got them all sand blasted in the cabinet which took longer than I thought, lots of nooks and crannies in those things to clean up.

Got them all finished and thought I'd go ahead and sandblast the front coil springs and make them look purdy. After careful calculations including time spent and how many times I manipulated those springs I'm pretty confident that there is somewhere between 13 and 87 miles of coil in those springs. Never thought I'd get them clean. Round and round, in and out, in between and out with multiple inspections to see where I'd missed and they are finally all clean.

All of these are off a Southern car which was pretty darn clean so I can imagine how tough it would have been on a car with undercoating or tar from the roads all over to get cleaned up. Might try to paint them tomorrow and let them set over the weekend to cure. Using the same SPI black epoxy primer I used on the frame. The frame turned out pretty nice, not completely shiny but not dull either so should be good enough for a nice driver.

One more day then up early to head to Thompson, getting really excited seeing all those beautiful cars and meeting everyone.

Dennis
 

tripower

Well Known Member
Supporting Member 2
Got a couple days to work on the car and pushed out the bushings from the upper and lower control arms. Even using a press some were pretty darn stubborn. Using a combination of the press, hacksaw, chisel, punch, vise and assorted other stuff I could find did get them all out without damaging the control arms. Got them all sand blasted in the cabinet which took longer than I thought, lots of nooks and crannies in those things to clean up.
A propane torch works great on the bushings to burn out the rubber and then the casings just about fall out.
 

Topstrap

Well Known Member
Sunshine and another productive day. Think seeing all those nice cars tomorrow has me excited and keeps us wanting to keep at ours.

Painted the front suspension parts today. I think Chris liked painting the frame more than all these little parts :) I tried to hold and help steady as much as possible so if I'm still covered in black paint tomorrow just ignore it.

So far this has been a blast, Chris is really enjoying it and that makes it that much better for me too. I probably wouldn't have tackled anything like this except he had an interest in this and anything I can do to share time and build memories with either of my sons is time well spent.

frontarmbefore.jpg

Not covered with tar, mud and rock chips like the older cars from Ohio.

rackofunpaintedparts1.jpg

Chris thought it looked like a cool wind chime.

chrispaintingfrontparts.jpg

chrispaintingfrontparts.jpg

closeuppaintedpartsfron.jpg

closeuppaintedpartsfron.jpg


OK, easy quiz for the day, what are these?
washers.jpg


Will let set tomorrow and put another coat or two on when we get up on Sunday. Liking it better all the time. Can't wait to start assembling it and make a roller out of it. Will probably have to touch everything up after pushing the new bushings in, wasn't sure whether to paint before or after assembly.

Dennis & Chris
 

Topstrap

Well Known Member
Another day of blasting, not much cleanup this time. I think most of it is in my shoes, hair, down my back and just about everywhere that would be embarrassing to talk about. Did manage to clean up the rear end housing and control arms, is supposed to rain tomorrow and will try to get the third member out and the new 3:55 posi unit in. Bearings look great but will replace all the seals.

Not sure if they have a value or anyone on here can use them but have the front drum brakes, spindle and the rear backing plate with E-brake cables and drums that I'll never use if anyone is close by and needs good cores they can have them. The drums look like they were just put on before the car was parked and the backing plates are in good shape with all the hardware still intact. Like to see them go to someone that can use them rather than have them sit around. I've been treated very well by everyone I've met and would like to pass on whenever I can to help others. Let me know...

controlarms.jpg

rearend1.jpg

rearend2.jpg


Little steps but was told by a buddy that had redone quite a few, just keep at it and try to do a little bit every day.

Dennis
 
Top